DIY Coffin Instructions
Miniature Coffin Shelf
DIY Assembly Guide
Welcome to your DIY miniature coffin shelf kit!
Materials You'll Need
Before you begin, make sure you have the following components and tools:
- Included: Wood pieces
- Adhesive: Wood glue or strong craft glue
- Optional tools: Rubber bands or small clamps (to hold while drying), fine-grit sandpaper (for smoothing edges), paint/stain/flocking (for finishing)
Assembly Steps
Step 1: Prepare Your Workspace
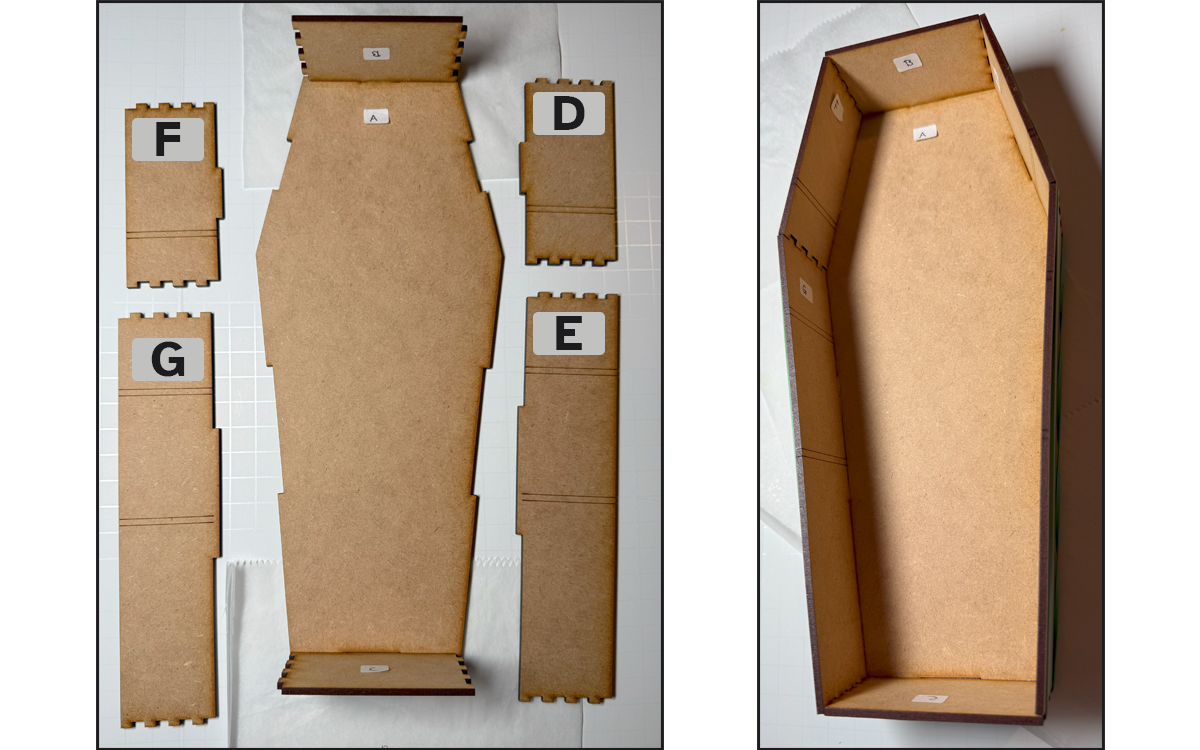
Lay out all the pieces and check them against the parts list.
Step 2: Attach Top & Bottom
- Glue the edge of the top piece (B).
- Fit it into the notch on the back panel (A) and press firmly. Use a square or alignment tool to keep the angle straight.
- Repeat with the bottom piece (C ).

Step 3: Attach Side Panels
- Glue the edges and notches of side pieces (D, E). Press into place against the back, top, and bottom.
- Repeat with side pieces (F, G) on the other side.
- (Optional) Secure with rubber bands until dry.
Step 4: Install Bottom Shelf
- Glue one edge of inner supports (K, L) and attach to inside walls.
- Glue back and side edges of bottom shelf (M). Insert with notched edge facing outward.
- (Optional) Clamp while drying.

Step 5: Install Middle Shelf
- Repeat the same process with (N, O) and shelf (P).

Step 6: Install Top Shelf
- Glue supports (Q, R, S, T) inside.
- Glue shelf (U) and fit with notched side facing outward.
- (Optional) Clamp while drying.

Step 7: Attach Front & Decorative Panels
- Glue the back of the open front panel (X) and align with the coffin frame. Glue decorative panel (Y) over the front panel.
- (Optional) Clamp or weigh down while drying.
